Showing posts with label Customise Blogger. Show all posts

Change width of blogger template

Many times when we find a new Blogger Template, and we decide to try it in our blog but later you find that the width of the template is not as you were looking for and drop that template and start looking for new blogger templates. Now this Tutorial is for this kind of blogger who want to Change width of blogger template.

MOST IMPORTANT:
Take Backup your current Blogger Template
Basically I am showing you this article considering a Standard 2 Column Blogger Template say Minima Template. It contains 5 things and we are going to increase width of each component in given order.
  • Outer Wrapper
  • Header Wrapper
  • Post column
  • Sidebar column
  • Footer

1. First "Login" to your Blogger account

2. Go to "Design" > "Edit HTML"

3. Find Header section and change Header Wrapper width to 820px (Search using CTRL+F) and change as shown below


4. Similarly goto the Outer Wrapper section and change the width to 850px as shown below


5. Change the Outer Wrapper "Text-Align" to "left" as shown below


6. Goto the Main Wrapper( Post column) section and change the width to 550px as shown below


7. Change the Main Wrapper "float" to "left" as shown below


8. Goto the Sidebar Wrapper and change the width to 270px as shown below


9. Edit the Sidebar Wrapper "float" to "right".


10. Now Finally, Goto Footer Section and Change its width to 850 px as shown below


11. Save the template and you are done.


Following changes we have made to our blogger template
  • Outer wrapper- 850px
  • Header- 820px
  • Main column- 550px
  • Sidebar- 270px
  • Footer- 850px
You can play with templates by increasing and decreasing the width of the templates make sure that main column width + sidebar column width should not exceed outer wrapper width. Footer width can be same as outer wrapper width.

You are Done !!! Happy Blogging

Source: Blog

How to use pages in blogger

I have been blogging since last 1 year and recently blogger have introduced a new idea of adding "Pages" in your blogspot blog as present in Wordpress. With Blogger Pages you can create a static pages that are linked to your blog. You can create pages like CONTACT US, EMAIL, ABOUT US, and many more upto maximum of 10 pages. Firstly I was quiet confused with this new pages, but after reading several posts on various tech websites and blog's, I got complete knowledge about it and I want to share these valuable information with you.

Simple step to create new pages in your blog

1. First "Login" to your Blogger account

2. Go to "Posting
" >>"Edit Pages" >>"NEW PAGE"

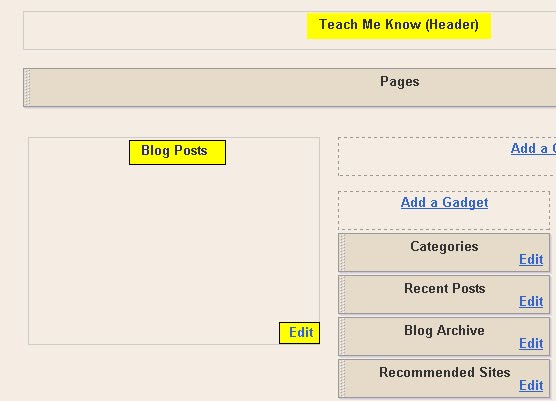
Here you can add various page title like CONTACT US or ABOUT US or EMAIL etc. After naming title write the content you want to display for the page you have created, say you have created a pages named CONTACT US, Then in CONTACT US you can write about your Email address, contact number, and that all stuff you want to display on CONTACT US page. When visitors visit your Homepage they will get to see various Page Tabs you have created in your blog as similar to shown in the image below


IMPORTANT NOTICE:

  • Note that you will not need to make a "Home" Page because that is automatically added when you add the Pages widget.

You are Done !!! Happy Blogging

Adjust Blogger Title Tags to Improve SEO

Todays Tutorial deals with How to gain Maximum Traffic, That is improving SEO (Search Engine Optimization) of your blog to get higher Traffic on your Blog by optimising your page title for various search engines like Google, Yahoo.

By default Blogger (Blogspot) blog does not have search engine optimised title tags. Blogger assigns title tags which contain the the Title of the post following the Name of the blog . But this type of title tags are not search engine friendly.

By simply reversing the position of the blog name and page title significant improvement can be gained in SEO resulting in higher blogger Traffic.

Follow the Steps for SEO optimization of your Blogger Blog:

1. First "Login" to your Blogger account

2. Go to "Design" > "Edit HTML" and search for the code shown below.


<title><data:blog.pageTitle/></title>


3. Now Replace the above code with the code shown below


<b:if cond='data:blog.pageType == &ampquot;item&ampquot;'>
<title><data:blog.pageName/> |
<data:blog.title/></title>
<b:else/>
<title><data:blog.pageTitle/></title>
</b:if>

4. Click on Save Template and then View Blog

5. If you are having any problem when trying to Insert and unable to Save the above code (Step .4), then the another code shown below might work for your blog


<b:if cond='data:blog.pageType == "item"'>
<title><data:blog.pageName/> |
<data:blog.title/></title>
<b:else/>
<title><data:blog.pageTitle/></title>
</b:if>

Now enjoy your SEO optimized Blog Title Tag. Be prepared to Welcome high traffic on your Blog.

IMPORTANT TIPS
  • Don't forget to take back up of your template before editing it


You are Done !!! Happy Blogging


Backup your Blogger Template

Before playing with your Blogger Template the most important step to be taken is to Get a Back up file downloaded or else you might end up facing a great trouble. Read the instruction below to backup your valuable blogger template.

1. First "Login" to your Blogger account

2. Click on "Design"

3. Click on "Edit HTML"

4. Finally, Click on "Download Full Template"

5. Save the XML File on your computer.

IMPORTANT TIPS:
  • You can use that XML file to restore your blogger template if you ended wrongly while Editing your blogger template.

You are Done !!! Happy Blogging

Remove Date and Author from Blogger post

Today I am going to write a Very Simple post, This post is specially Dedicated to begginers. This post is for those guys who want to "Remove date from the Blogger post" or "Remove Authors name from Blogger post". Both of these tasks can be done at the same time and is simple to do.

In the Image shown below there is date Stamp in blogger post, now we are going to remove this Date time Stamp along with many other components in very few Steps


1. First "Login" to your Blogger account

2. Go to "Design" > "Edit " in Blog Posts as shown in image below


3. Now select the Items you want to show in your Blogger post and Check the Boxes as shown below


4. Save the Changes.


You are Done !!! Happy Blogging

Display Code in Blogger Post


In my previous post Adding Meta Tags to Blogger. I was quiet struggling to insert a code in the blog post , But after several Trial and Error methods finally I suceeded in inserting code in my blogger post and want to share this valuable but simple trick with all my blog readers.

1. Go to "Design" > "Edit HTML" and search for the "css" section
2. Now Copy and Paste the code shown below in css section of your blog .


.postCode{
background:lightyellow none repeat scroll 0 0;
border:1px inset orange;
height:150px;
margin:10px;
overflow:auto;
padding:6px;
text-align:left;
}
3. Save the Changes done.

4. Now whenever you want to insert code in your post use following format:

<pre class="postCode">
YOUR CODE
</pre>

5. Don't forget to encode the code which you want to display in blog post CLICK HERE

6. After Encoding the Code Goto Step 4

IMPORTANT TIPS
  • Don't forget to take back up of your template before editing it

You are Done !!! Happy Blogging

Adding Meta Tags to Blogger

Meta tags are very important for the SEO of the blog. Meta tags help search engine crawlers know about the content of the blog,website or post. Now I will Explain the tutorial of Adding Meta Tags to Blogger.


How to add meta tags to blogger


1. Go to "Design" > "Edit HTML" and search for the code shown below using keyboard buttons CTRL+F


<b:include data='blog' name='all-head-content'/>

2. Now Add this Code just after the above code:

<meta content='DESCRIPTION HERE' name='description'/>
<meta content='KEYWORDS HERE' name='keywords'/>
<meta content='AUTHOR NAME HERE' name='author'/>

Changes to do in above Code:

DESCRIPTION HERE: Write about your blog description
KEYWORDS HERE: Write the keywords of your blog
AUTHOR NAME HERE: Write the Your name

3. Don't forget to save the changes.

Important Tips:

  • Don't repeat the keywords more than 3 times.
  • Don't forget to take back up of your template before editing it

You are Done !!! Happy Blogging.

Any Query related to any Post please feel free to comment on it so that I can Improve and provide you with better blog